
Thanks to numerous improvements, these days an upgrade from Windows 7 to Windows 10 should go off without a hitch – at least in theory. Practically, however, more and more users complain Windows Update Error 0xC1900101 failed to install, associated with the additions 0x30018, 0x30017, 0x20017 or 0x40017. A successful completion often remains impossible in these cases.

Recently, error 0xC1900101 even affects the first preview build of Windows 11, the next milestone from Microsoft. As usual for error codes of this kind, it is also a problem with your drivers. The conflict, especially with error 0xC1900101 – 0x20017, can be solved in no time with the right tools. We show you how.
Fix Error 0xC1900101: Failed to Install
- Install all Available Windows Updates
- Check for Sufficient Hard Disk Space
- Check and Remove Hardware
- In Case of Error 0xC1900101: Update the Drivers
- Perform a Clean Reboot
You don’t need to do each of these solutions. Just try the steps one after the other until you find the solution that suits you best. You can forget about the rest.
(1) Install all Available Windows Updates
Before you switch from an older version to Windows 10, you should update your current driver to the latest version for your operating system. Then you proceed as follows:
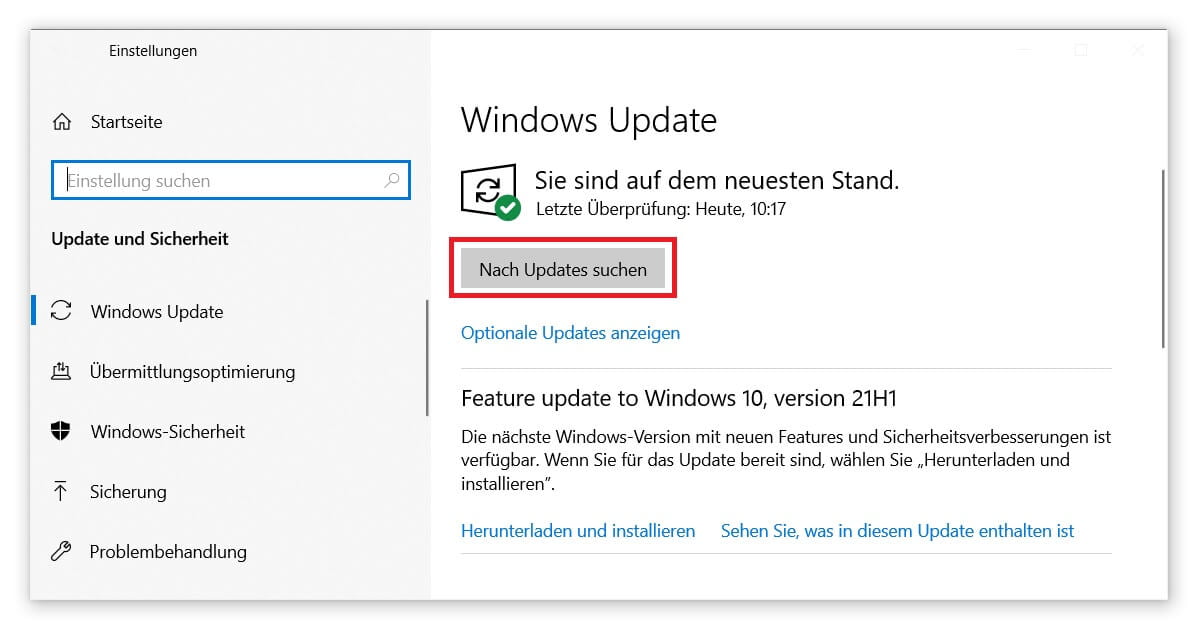
- Open the Settings via Windows logo key + I or by using the gear icon in the start menu.
- Select Update and Security and press the Check for Updates button.
- Install all found and pending Windows updates to prevent error 0xC1900101: failed to install. This includes major feature updates like to version 21H1.
(2) Check for Sufficient Hard Disk Space
During an upgrade, the desired operating system is freshly installed. This means that you have to make sure that there is enough free space on the corresponding partition. Otherwise you will occasionally get the error 0xC1900101 – 0x20017.
Windows 10 already requires at least 20 GB for the 64-bit edition, while it is still 16 GB for 32-bit. But that’s no problem! We show you the best methods of how you can clean up your hard disk for free.
(3) Check and Remove Hardware
First of all, you should remove all external devices that you can live without for a moment before any comprehensive upgrade. A second monitor? Get rid of it. Printer, headset or any additional storage media as well. Especially outdated hardware, whose drivers could urgently use an update, often causes error 0xC1900101.
Alternatively, you can determine the problem in the Windows Device Manager:
- By pressing Windows logo key + X, you can access Quick Start, where you will find the Device Manager.
- Double-click on each category in the list to open it.
- If a yellow exclamation mark appears next to the name, you have found your mistake.
- Ideally, you can now update the driver with a right-click. If necessary, you can even deactivate or uninstall the device.

(4) In Case of Error 0xC1900101: Update the Drivers
Of course, as described in the previous step, you can check all your devices manually for driver errors. If you select devices without an exclamation mark, Windows 10 will automatically search for drivers via a context menu. This helps with 0xC1900101 0x20017, 0x30017, 0x30018, and 0x40017, but is also quite tedious.
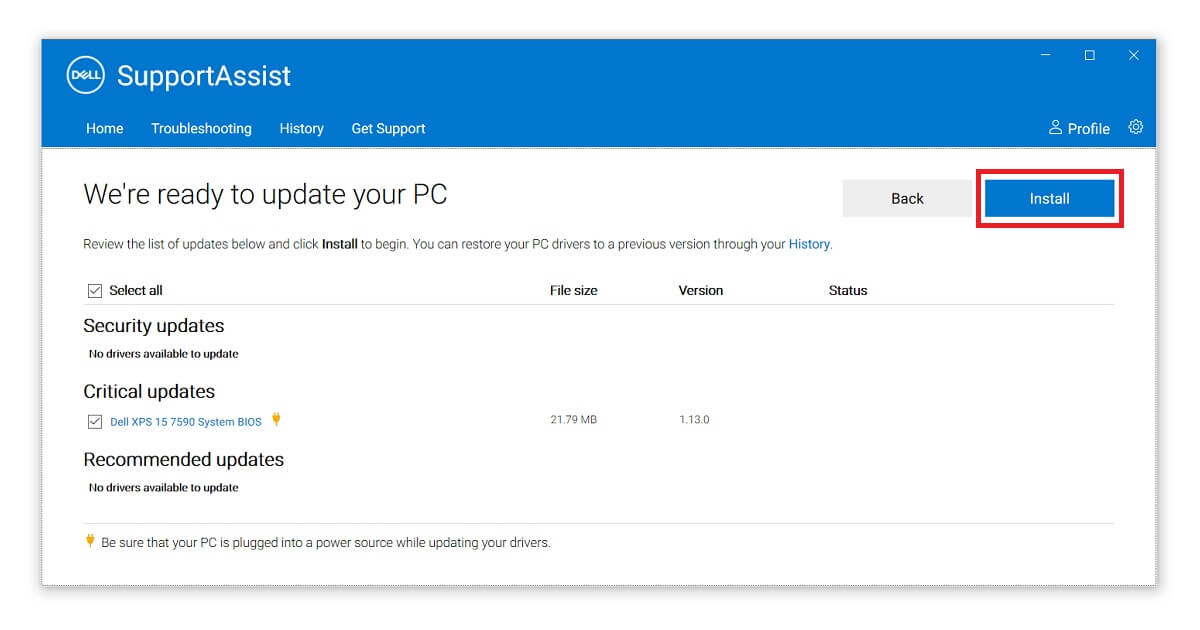
Third-party programs provide a remedy. The majority of PC manufacturers now offer secure applications from their own sources. For example, if you use a laptop from Dell, you will get plenty of support from an app called SupportAssist. Alternatives can be found as freeware for download.
Note: Don’t forget to restart your computer between these different steps and after completing them. Some changes will be applied only then.
(5) Perform a Clean Reboot
If every attempt so far has been unsuccessful, only repairing Windows may help. If you get error 0xC1900101: failed to install, it is more often than not directly related to your autostart, where many processes can lead to internal conflicts. Therefore, you should try a clean restart of Windows 10 in advance:
- Start the Run function via Windows logo key + R.
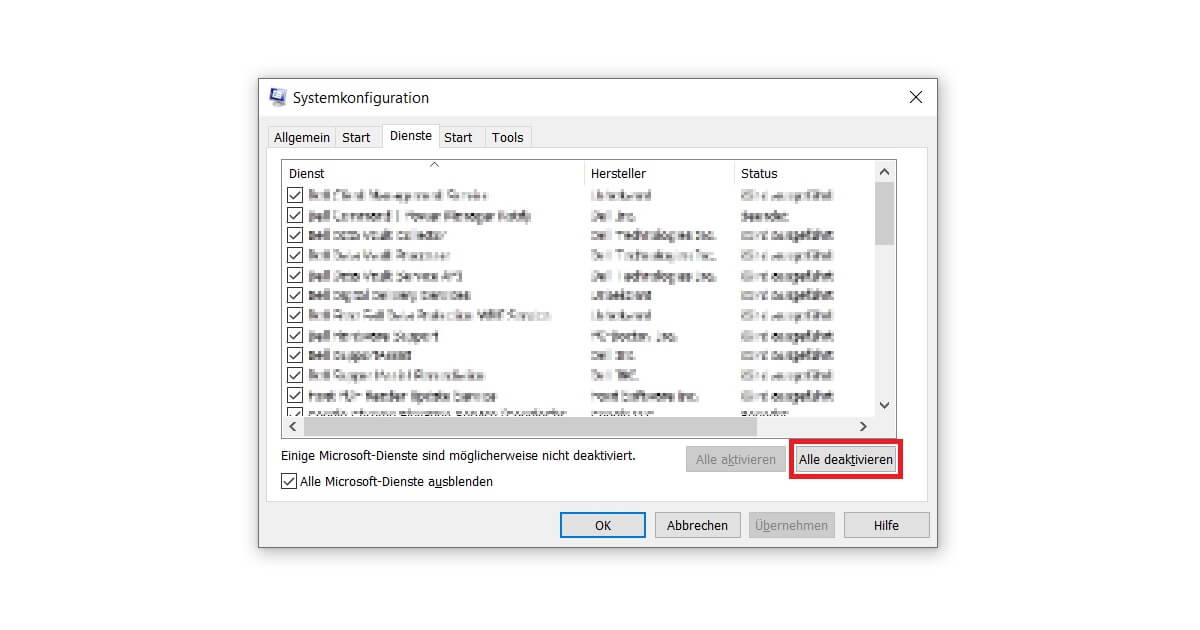
- Enter the command msconfig and confirm with Enter to open the system configurations.
- At the top you will find the Services tab. Check the box Hide all Microsoft services and then click on Disable all.
- Now switch to the Start tab and open the Task Manager.
- Select each item in the list individually until they are all disabled.
- Confirm your adjustments by clicking OK in the system configuration and restart your computer. Try the upgrade again in the clean startup environment.
This should make the Windows update errors 0xC1900101 0x20017, 0x30017, 0x30018, and 0x40017 history. You can then start in a new environment and finally work with the best version of Office 2021 Professional Plus.