You feel like your Windows 10 Start menu is not working properly? Or the display doesn’t open? Maybe it just stays empty and therefore loses essential functions? How you can use Windows 10 for repairing the Start menu? It’s anything but trivial, because the error can be located in many different places.
At the latest since Microsoft had said goodbye to the classic design with Windows 8 the problems with the start menu also accumulated. After this controversial step, Windows 10 now merges classic elements like the program list with the dynamic tiles. The user decides for himself which variant he prefers.
Thus, everyone should be able to cope with the current Start menu – nothing stands in the way for you to upgrade to the latest Windows version. Unless a serious error occurs with your operating system, you will have to do some repairing if your Windows 10 Start menu is not working. We will show you the best way to go about this.
How to: Repairing Windows 10 Start Menu not Working
- Perform Windows Update
- Restart Start Menu and Computer
- Check for Missing Apps
- Restore Corrupted System Files
- Make Minor Adjustments
Accordingly, let’s start with the first step, which generally proves to be useful for most error messages:
1. Step – Perform Windows Update
If you want to repair your Windows 10 Start menu not working, you can solve basic problems or minor display bugs with a system update. To do this, simply look for updates in the usual place, via the Windows settings and there under Update and Security. Unfortunately, it is not uncommon that older versions of your operating system have security gaps again and again.
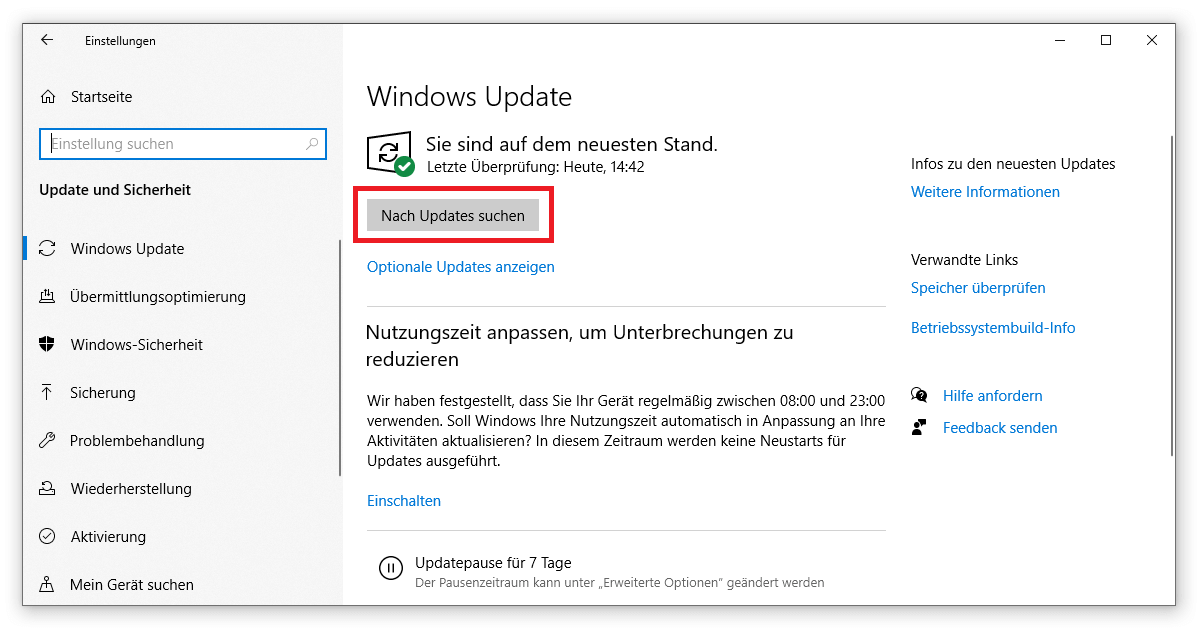
If you usually open the settings by right-clicking or using the gear icon in the Start menu, you might have a problem now. But don’t worry, Windows 10 offers numerous options to get into the settings. The simplest solution is to call them up via the key combination Windows logo key + I. Alternatively, click on your notifications on the far right of the taskbar and select All settings there.
2. Step – Restart Start Menu and Computer
After the update, you should now have at least Windows version 2004. This is an advantage because the Start menu has been part of the system apps since Windows 10. Therefore, you can now find the process in the Task Manager. If you try repairing the Windows 10 Start menu not working, you can open the Task Manager with a right-click on the taskbar or via Ctrl + Shift + Esc. You should already find yourself in the Processes tab, where you look for the Start entry. By clicking on End Task, the Start menu automatically shuts down and restarts.

The same applies to the application StartMenuExperienceHost.exe, which is listed in the Task Manager under the Details tab. If the problems are still not solved afterwards and Start and Cortana are missing, a simple restart of the PC often helps. If you do not have access to the On/Off button in the menu and the shortcut Alt + F4 does not help, you can use the Run function of Windows 10 to repair your Start menu not working. To do so, press Windows logo key + R and type shutdown.exe /r /t 0 in the text box for a clean restart. After logging in again, the Start menu should work.
3. Step – Check for Missing Apps
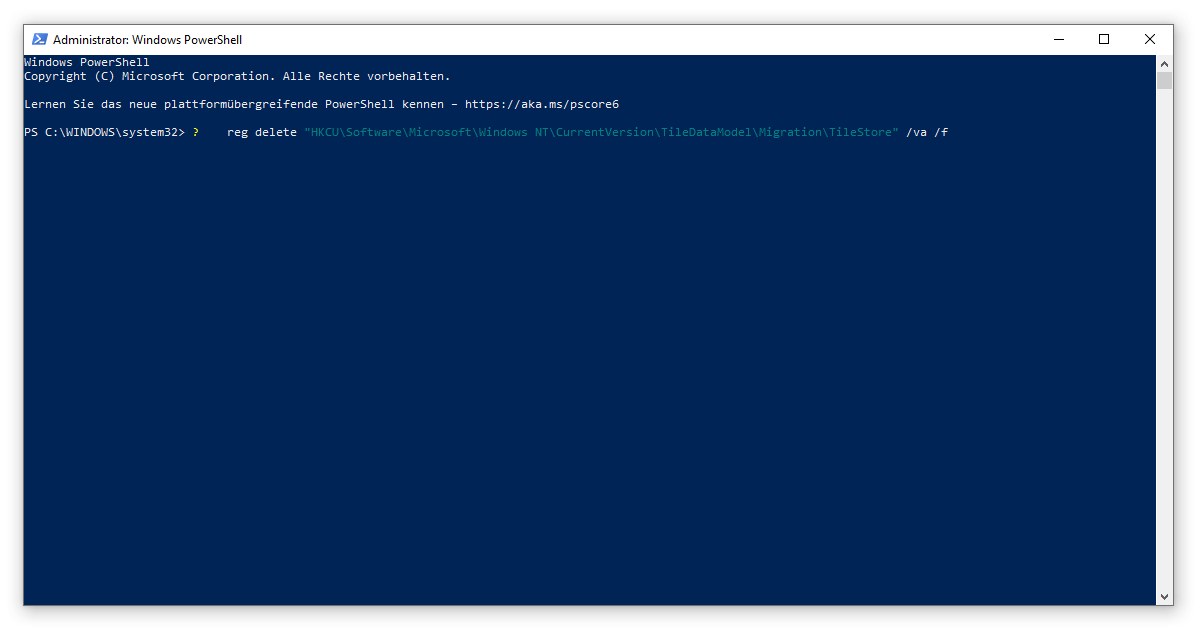
If, on the other hand, you notice that important apps are not displayed in your Start menu, either in the list or in the tiles, the best thing to do is to use Windows PowerShell. You can open it by right-clicking on the Start menu or by pressing the Windows logo key + X if the display is missing. Make sure to run the application as administrator and copy the following lines into it:
- reg delete “HKCU\Software\Microsoft\Windows NT\CurrentVersion\TileDataModel\Migration\TileStore” /va /f
- get-appxpackage -packageType bundle |% {add-appxpackage -register -disabledevelopmentmode ($_.installlocation + “\appxmetadata\appxbundlemanifest.xml”)}
- $bundlefamilies = (get-appxpackage -packagetype Bundle).packagefamilyname
- get-appxpackage -packagetype main |? {-not ($bundlefamilies -contains $_.packagefamilyname)} |% {add-appxpackage -register -disabledevelopmentmode ($_.installlocation + “\appxmanifest.xml”)}
Execute each of these four commands with Enter so that you can go on about repairing your Windows 10 Start menu not working. To be on the safe side, you should reboot the device once afterwards.
By the way: We have already used shortcuts with the Windows logo key several times. If you have similar problems, we can recommend our guide on this topic.
4. Step – Restore Corrupted System Files
Another way to repair the Start menu is to use Windows PowerShell (run as administrator again). Because the background can also be damaged system files. Therefore, check them in PowerShell with the command sfc /scannow. If the application then reports problems with the integrity of the files, you restore an older system image by entering DISM /Online /Cleanup-Image /RestoreHealth.
5. Step – Make Minor Adjustments
If none of this helps, you are left with minor tricks that have already led to success in individual cases:
- Search for your graphics card in Windows 10’s Device Manager (Windows logo key + X), deactivate it for a short time with a right-click, restart and turn it on again. This helps especially with Nvidia products.

- You can access Windows’ tablet mode via the notifications (Windows logo key + A). If you open the Start menu there and then switch back to the normal view, various problems can be solved.
- Create a new user account and check whether the problem with the Start menu also exists there. If this is the case, further steps, such as repairing the entire operating system and restoring it, are usually all that is needed.
You succeeded with repairing Windows 10 Start menu not working? If you want to get rid of the problem forever, you should check out the new Windows 11!
However, we hope that you have already fixed the error and do not need to invest any additional time. Because even simple measures like the deactivation of Cortana sometimes turn out to be unnecessarily complicated. This is seldom the fault of the user, whether you use Windows 10 Home or Windows 10 Pro. But with this guide, you certainly can try repairing Windows 10 Start menu not working on your own without too much trouble.