
There are many reasons for learning how to create a Virtual Machine in Windows 10, but most of them concern your own security. Just like a reasonable antivirus software protects you against pests from the net, a Virtual Machine shields Windows 10 completely. It is a separate unit that acts separately from your previous operating system and a good alternative to the use of the Windows Boot Manager.

We show you how to create a Virtual Machine in Windows 10 and safely install your virtual PC. But first, we’ll explain some basics that will lead to a better understanding.
What is a Virtual Machine?
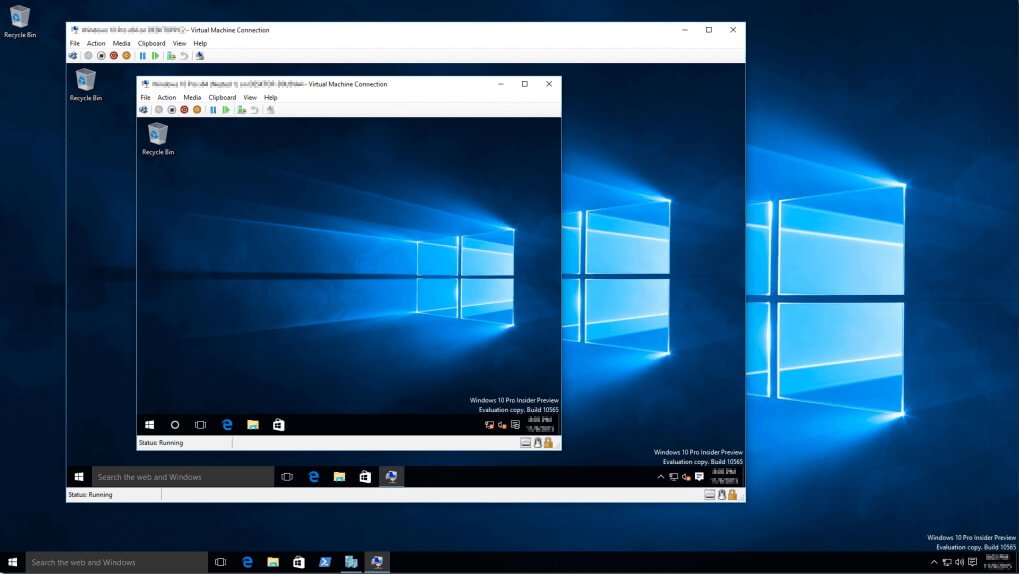
A Virtual Machine (VM) in Windows acts like a separate system that works independently and autonomously from the rest of the PC. Hence the name Virtual PC (or Virtual Machine). It is, so to speak, a replica of your computer.
The Advantages of Learning how to Create a Virtual Machine in Windows 10
The majority of users want to learn how to create a Virtual Machine in Windows 10 for trial and testing without putting important files or documents on the actual PC at risk. You’ve always wanted to set up a Remote Desktop? Or try to uninstall a particular Windows update? Then better experiment on your Virtual Machine instead of directly messing with the Windows 10 settings.
Even a new operating system can be installed virtually. This way, Linux runs smoothly under Windows 10 and you can take advantage of both interfaces. You can even access exclusive software offers this way. In addition, you can start questionable content like outdated programs on the Virtual Machine, which you already have uninstalled on your main computer. All installations remain trapped in the virtual frame and have no effect on the outside.
Setup – Which Virtual Machine for Windows 10?
If you want to know how to create a Virtual Machine in Windows 10, you need special software. Many applications have proven themselves and are available free of charge for this purpose, for example Oracle VirtualBox VM or the Workstation Player from VMWare. However, we will take a closer look at the integrated solution of Windows 10: Hyper-V from Microsoft.
Note: The components of Hyper-V are already available with the right Windows edition and only need to be activated. You need either Windows 10 Pro or Windows 10 Enterprise. Users with a license for Windows 10 Home have to upgrade in advance to a corresponding edition.
To be able to create a Virtual Machine in Windows 10 using Hyper-V, you then proceed as follows:
Setup – Activating Hyper-V
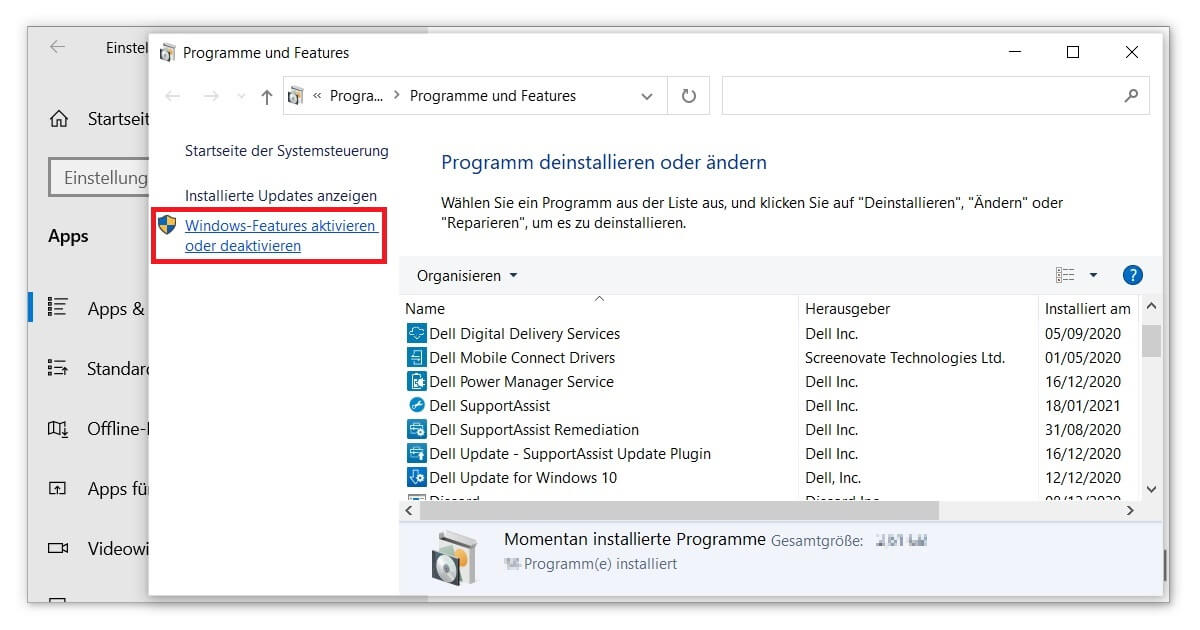
- First, you need to activate the Virtual Machine tool. To do this, open Settings (Windows logo key + I), go to Apps & Features and select Programs and Features under Related Settings. There you will find the option to enable or disable Windows features.
- From the list of Windows features, find the Hyper-V entry and make sure that the checkmark is confirmed. Then restart your PC once.
- Now open the Hyper-V app. You can find the program either via the Start menu or the search function (Windows logo key + S).
- In the Hyper-V interface, click on Virtual Switch Manager under Actions on the right. Under External you select Create virtual switch.
- In the first text field, you should now define a catchy name. You also have to make sure that the Connection type is set to External network. Finally, activate the option Allow sharing of this network adapter for the management operating system.
- After confirming with OK, in some cases a connectivity message appears, to which you answer with Yes.
- At this point, you can finally see how to create a Virtual Machine in Windows 10. Again on the right side of the Actions window, click New to access the Virtual Machine option.
- Define further settings as you wish or rely on the Microsoft defaults. Here you also enter the name for your Virtual Machine. Generation 1 is basically the right choice, and you should allocate at least 4096 MB memory. To be on the safe side, you should also activate Use dynamic memory for this virtual computer.
- Remember the path. Finally, you have to enter it in Memory path parallel to the size of the Virtual Machine you have chosen. You still know the name of your switch from step 5? Very good, because you enter it as connection.
Setup – Success!
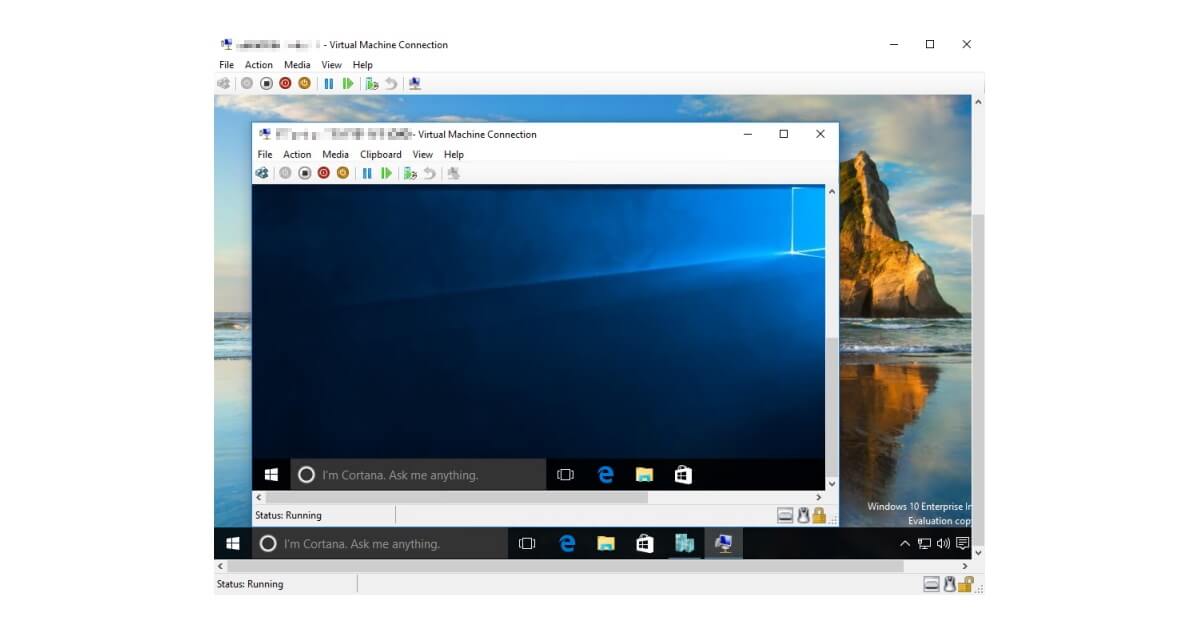
Congratulations! After you click Next one last time, that’s it for how to create a Virtual Machine in Windows 10. Now you just have to install the desired operating system. For this, as usual, have your ISO file or the prepared USB stick ready. You can then access your Virtual PC by double-clicking Connect in the Hyper-V actions.